Ads 468x60px

Showing posts with label DIY. Show all posts

11.17.2023

Top 10 Easy DIY Crafts to Make At Home.

Crafting is not only a fantastic way to create unique homemade items, but it also serves as a creative outlet that can be incredibly therapeutic and rewarding. In this blog post, we are going to explore ten of the best and most simple DIY crafts you can make right at home. So, whether you're a seasoned crafter or a DIY rookie, gather up your craft supplies and get ready to ignite your creative spark!

Photo credit: Adonyi Gabor on Pexels.

Importance of DIY Crafts as a Creative Outlet

DIY crafts play a pivotal role in nurturing our creativity. It enables us to use our imaginations to create something new and innovative. Don't worry if you think you're not 'creative'- crafting isn't about perfect end results, it's about the process and pleasure of creation itself.

Some of the specific aspects that make DIY crafting an excellent creative outlet include:
  • It encourages creative thinking
  • It provides a platform for self-expression
  • It helps relieve stress by engaging the mind and hands
  • It gives a sense of accomplishment once the project is finished

Benefits of Making Crafts at Home

Producing homemade crafts carry a host of fantastic benefits. Some of them include:
  • It's a cost-effective way of creating personalized gifts
  • It’s an excellent activity for family bonding if you involve children in the process
  • You can create decor pieces that cater to your specific taste and style
  • It can be a satisfying and productive way to spend some free time
  • You can even turn your hobby into a profitable business if you wish

Stay tuned as we delve into the top 10 easy DIY crafts that you can start today, right from the comfort of your own home.

Paper Crafts

Stepping into the captivating world of paper crafts, these homemade projects tend to bring out the child in everyone. Whether it's a rainy day or you're looking for a productive way to keep your hands busy, these two craft ideas are easy to make and delightful to display.

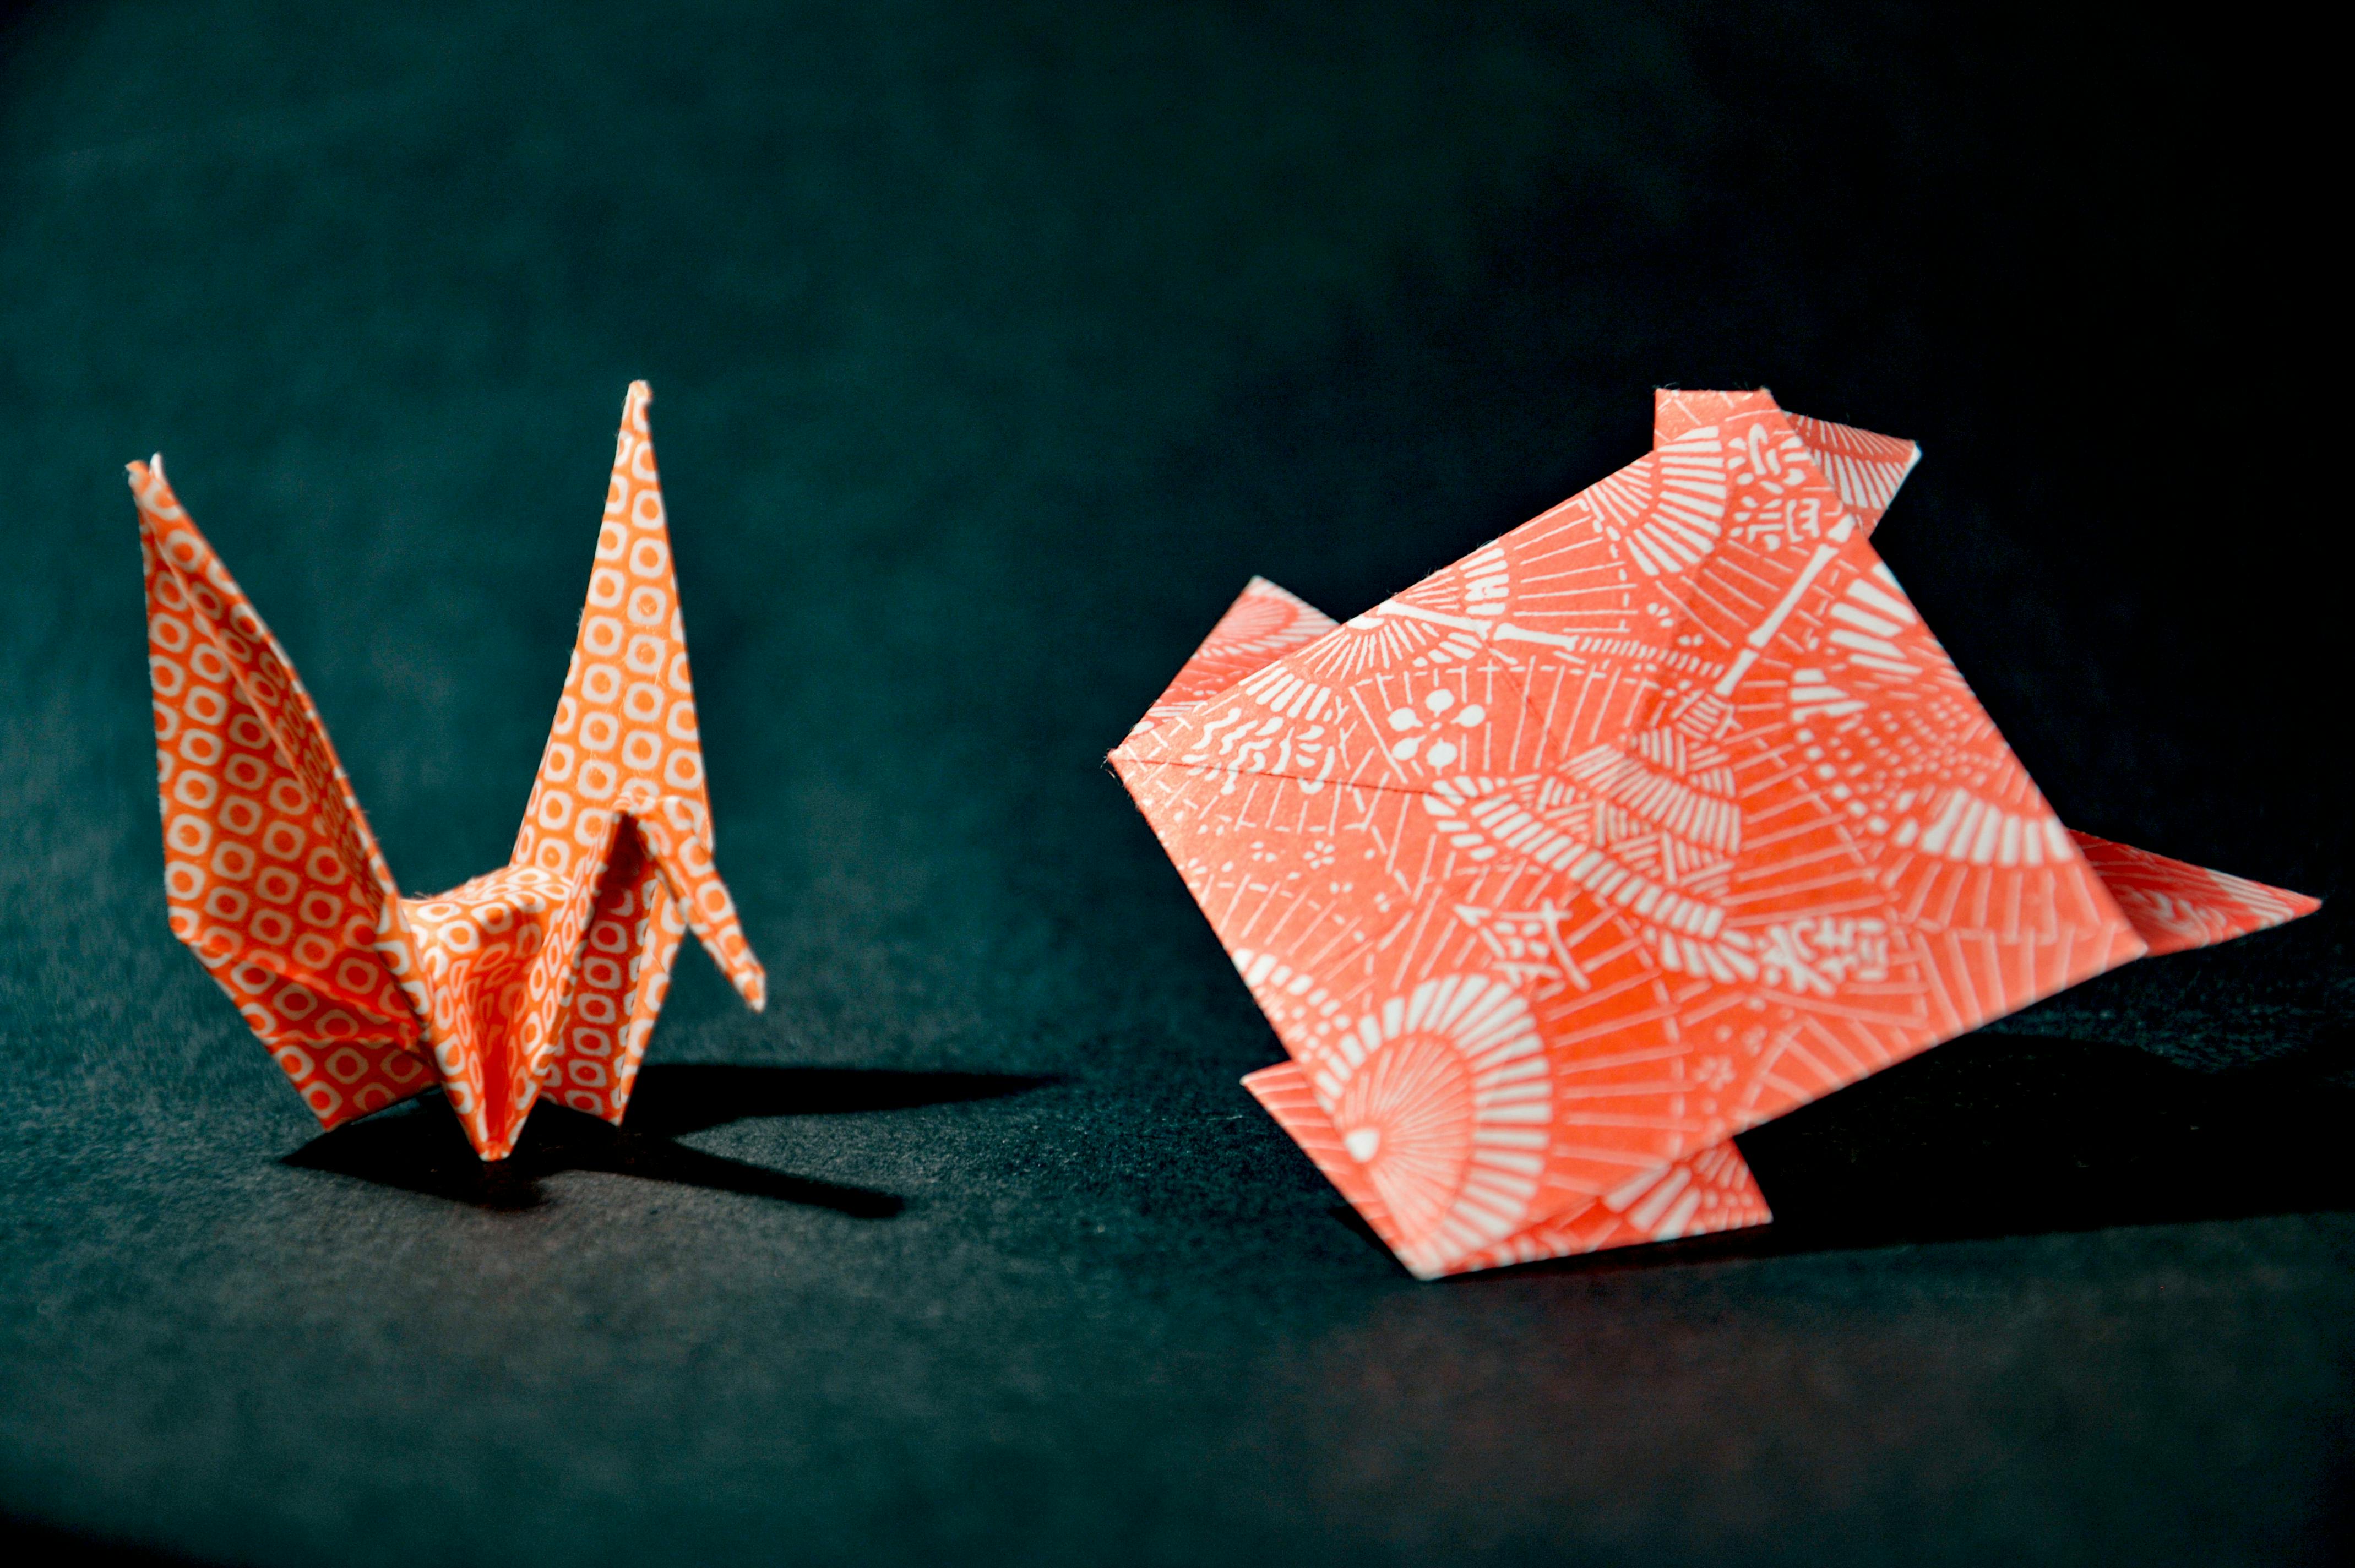
Photo credit: Saeed Khokhar.

Origami Animals
Origami, the art of paper folding, is engrossing and therapeutic in its practice. Japanese in origin, it is not only fun but also boosts mental concentration and fine motor skills. Origami animals are one of the easiest and most popular projects to start with. Grab yourselves some colorful square origami paper and transform it into delightful creatures.

- Frogs: A fun origami project even for beginners.
- Butterflies: A little more advanced, but so rewarding creating a delicate flurry of paper butterflies.
- Cranes: A classic in the origami world. You can add a string and turn them into a pretty mobile.

Paper Flowers
For those of you who love botanical additions to your home decor but could do without the watering, try your hand at crafting delicate paper flowers. These lifelike creations are a terrific way to add a touch of nature indoors without worrying about upkeep.

- Roses: The ultimate symbol of love.
- Daisies: These white beauties are simple to make and look bright and cheery.
- Tulips: Add a dash of Dutch inspiration to your home with DIY tulips.

With either option, you're bound to create some very novel and eye-catching decor for your home. Happy crafting!

Recycled Crafts

Looking for an opportunity to save the environment while indulging your crafting, creative cravings and reducing the clutter at home? Be prepared to swoon over these easy and fun recycled crafts that are a major win-win option for your home.

Photo credit: Inspiring Women

Tin Can Lanterns
Tin can lanterns are an absolutely delightful way to brighten up your space. With just a used tin can, a small hammer and a nail, you can bring your designs to life:
  1. Remove any labels from a tin can and clean it thoroughly.
  2. Fill the can with water and freeze it, to ensure it holds its shape while you work.
  3. With a nail and a hammer, make your desired patterns on the can.
  4. Once done, let the ice melt, dry up the can, and paint any color you prefer. Voila, your lanterns are ready! Add a candle or LED light, and brighten up your space in an effortless and eco-friendly way.

Plastic Bottle Planters
Plastic wastes are a tremendous environmental hazard and finding good use for them is always a big deal. Transforming used plastic bottles into chic little planters is a super fun and environmentally friendly DIY project. All you need to do is cut the plastic bottle in half, paint it to your desired color, fill it with soil and plant your flowers, herbs or succulents. This way you're not only creating a bespoke home decor but taking an active part in saving our environment.


Newspaper Coasters
Newspapers are something every household has. Instead of tossing them in the recycling bin, how about a fun craft? Try creating these mesmerizing newspaper coasters:
  1. Cut the newspaper into strips and roll them tightly into thin rods.
  2. Start coiling these rods from one end and secure them with adhesive.
  3. Cover the coasters with a decoupage medium to make them water and heat resistant.
These eco-friendly coasters are not only going to add a vintage charm to your table, but also a great conversation starter!

Starting with these craft ideas, you’ll soon discover the immense joy and fulfillment that comes from giving new life to things that have lost their original purpose. So, make these fun, easy DIY crafts a part of your home and enjoy the sustainable crafting journey!

Fabric Crafts

Got a pile of unused fabric lying around your house? Repurposing them into crafts is one of the best ways to get creative and have a little fun at the same time!

Here are two fantastic fabric craft ideas you’ll definitely love as much as we do. So, leave everything aside, let your creativity radiate, and dive right into crafting land. 

Photo credit: In the Cove.

No-sew Pillows
Who says you need to be a master seamstress or at least a sewing enthusiast to have homemade pillows? With this easy no-sew pillow DIY craft, you'll have yourself a set of lovely, cozy pillows in no time.

- Start by cutting two squares of fabric, the size depending on how big you want your pillow to be.
- Put the two pieces together, the patterned sides facing each other.
- Start tying the fringes together. Only tie three sides, leaving one side open to stuff your pillow.
- Fill your pillow with stuffing and then tie the remaining fringes together, and voila! You’ve got a no-sew pillow.

T-shirt Tote Bags
Turn your old t-shirts into handy tote bags with this simple DIY craft. This is an eco-friendly way to upcycle your old stuff.

- First, cut off the sleeves of the t-shirt and make a larger cut to frame the neckline, which will serve as the handle of the bag.
- Flip the t-shirt inside out and sew (or glue, if you don't have a sewing machine) the bottom closed.
- Turn it right side out again, and there you go! Your very own homemade T-shirt tote bag ready to use or gift to a friend.

Nature Crafts

Nature has a habit of providing the best materials for our crafting needs. Let's dive into creating some beautiful, simple, and fun nature-inspired DIY crafts right at home.

Photo credit: S&S Blog.

Pinecone Bird Feeders
This one’s a classic and it’s perfect for the colder months when our feathery friends could use a bit of extra help finding food. Plus, Pinecone bird feeders are easy to make! All you need are some pinecones, a bit of peanut butter, bird seeds, and a string for hanging. Using a butter knife, smear some peanut butter over the pinecone.

- Roll the peanut butter covered pinecone in bird seeds until it's well coated.
- Secure the string onto the pinecone.
- Hang it outside on a tree branch.

Bingo! You've given your local birds a tasty treat and made a natural ornament for your garden.

Leaf Prints
Making leaf prints is another simple and beautiful DIY craft to utilize nature's bounty. Collect leaves of different shapes and sizes from your garden or a nearby park.

- Lay a piece of paper.
- Arrange the leaves on top.
- Coat the leaf's backside with some paint.
- Flip it over and press onto your sheet. Voilà, you got some stunning nature-inspired prints! These can be used to create personalized gift wrap, greeting cards, or to decorate your walls.

These easy and fun ideas are not just eco-friendly, but also great to engage youngsters in crafts while teaching them about nature's beauty.

Mason Jar Crafts

There's simply something magical about Mason jars! These simple everyday objects that once held grandma's homemade jam can be transformed into the most charming and practical crafts. Let's explore a few ideas that are easy, fun, and can add a unique twist to your home.

Photo credit: Elle Decor.

Mason Jar Candles
Who doesn't love the soft, warm glow of a candle? Better yet, making your own allows you to fill your home with your favorite scents. Here's how:

- Find an old Mason jar (or buy one from your local craft store).
- Purchase some wax flakes (soy is a great, eco-friendly option), essential oils for fragrance, and a wick.
- Melt the wax flakes in a pot, stirring in your chosen oil once it has fully melted.
- While the wax is cooling slightly, secure your wick to the bottom of the jar.
- Pour the wax into the jar, ensuring the wick stays upright.
- Allow the candle to cool and firm up before use.

Mason Jar Herb Garden
In addition to candles, Mason jars can be used to create your very own herb garden. The process is amazingly simple and deliciously rewarding.

- First, fill your Mason jar about 2/3 full with potting soil.
- Add your herb seeds (such as basil, mint, or thyme), and then cover with a little more soil.
- Water your seeds lightly, and place your jar in a sunny window.
- With just a little patience, you will soon see your herbs sprouting! Continue to water as needed.

In no time, you'll have fresh herbs right at your fingertips for your cooking adventures and fresh-smelling, homemade candles to create a cozy ambiance! 

Conclusion

Well, the journey we took together was nothing short of exciting! From discovering our creative side to getting our hands busy, it's clear how both satisfying and fun crafting can be. So, let’s quickly recap on our top 10 easy DIY crafts to make at home that delighted us in this guide:
  • Dream catcher
  • Handprinted mugs
  • Homemade bath bombs
  • DIY candle holders
  • Handmade photo frames
  • Origami deigns and patterns
  • Homemade jewelry using beads
  • Popsicle stick bookmarks
  • Homemade soaps
  • DIY wall décor using stock photos

Encouragement to start crafting and share creations with others If you've ever thought crafting could be daunting, hopefully, these easy crafts we've explored have changed your mind. There's no creativity too small or detail too trivial when it comes to DIY crafts. I encourage everyone reading this to pick up your crafting tools, dive into these projects, and start creating!

Don't just stop there. Once you've whipped up these homemade crafts, share them with loved ones. Better yet, post them on your social media! Inspire others with your creativity and even help make their home a little bit more personal and inviting with your DIY crafts. Remember, the beauty of creativity lies within the joy you get from creating something from scratch and the happiness it sparks in others that appreciate them.

Take that step today. It's time to rock the world with your craftiness! Happy crafting!


3.15.2021

4 Ways to Make Money Off of Your DIY Projects.

You can pretty much make the DIY version of anything. Do you have your eye on a specific shirt but can’t bring yourself to spend the money on it? Easy, just break out your sewing machine and make it by hand. Found an old piece of furniture at a thrift store that you see potential in? Just reupholster it and give it a brand new life.

DIY projects do not only save you money, they are also really fun! They are a great way to get creative and use your hands to make something useful. But, if DIY projects have been a passion of yours for awhile, you might want to take that skill and turn it into a business that you can actually make a profit from. People will pay big bucks to buy something that someone else spent the time and effort putting together. Turn your passion into a side hustle with these 4 easy ways to make money off of your DIY projects:

Photo credit: Adonyi Gabor on Pexels.

1. Master Your Craft
In order to actually sell the item that you are making, you need to make sure it is high-quality and durable. If you are making and selling beaded necklaces, you do not want them to fall apart in the mail. It will take a lot of time and trial and error to fully master your craft, but it will be worth it once the money comes flowing in. If you make jewelry, you are better off investing in high quality tools and beads to ensure your end product is worth the price you’re selling it for.

Photo credit: Miriam Alonso on Pexels.

2. Experiment With Multiple Projects
Whether you are doing DIY projects as a side hustle or as your main source of income, it is important to experiment with multiple projects. Do not stretch yourself out too thin, but it never hurts to be multifaceted. For example, if you make your own skin care products, experiment elsewhere in the beauty industry as well. Play around with making DIY bath bombs and soap in fun and unique shapes with silicone moulding material. The options are truly endless, you just have to put yourself out there and get creative!

RM and J-Hope do some craftwork with ARMY Bombs, 
Jungkook joins their live stream. :)

3. Utilize Social Media
To make money from your DIY projects, you have to use social media to your advantage. Starting a small business of selling homemade crafts is time consuming and will probably take a while before you make your first sale. However, utilizing social media and creating a brand will expedite the process. There are so many social media platforms out there that are designed to help businesses gain attention and make sales. You first have to make a website and create accounts on multiple platforms. Then, you can look into doing advertisements, tracking engagement, and creating a presence on social media. If you need extra support with engagement on your social media pages, then you might want to look into something like buying specific followers to help with your visibility. You can buy Twicsy TikTok followers now and see how this can work, but always do your research first to see which platform is best suited to reach out to your intended customer base. To reiterate - figure out which business model works for you and spend time perfecting it.

Photo credit: Lisa Fotios on Pexels.

4. Follow the Trends
When it comes to making money, you need to stay on top of the trends. People will pay big bucks for trendy items, and if you stay up to date on what is popular, the money will follow. If your passion is sewing and making clothes, keep track of what styles of clothes are trendy right now and learn how to make them by hand. Trendy items also tend to sell for more, which will lead to more cash in your pocket. Pinterest is a great site to stay on top of what is and isn’t in style, in addition to just being on social media in general.

Yoon Se Ri and Ri Jeong Hyeok, always exuding charm and sophistication.
Son Ye Jin and Hyun Bin in Crash Landing on You (2020).

There is no better time than the present to turn your passion for DIY projects into a business. Whether your skill is sewing clothes, making jewelry, or refurbishing furniture, there are a plethora of ways for you to succeed with your projects, you just have to be patient. Starting an online business is intimidating, but with time and dedication, it will be worth it. We all dream of making money by doing something we love, so follow these simple tips and soon enough your project will take off.
 

8.26.2018

Seoul Searching | Laneige Flagship Store at Ewha Fashion Street.

Laneige opened their newest - and perhaps their prettiest - flagship store in Seoul a few months back, and Yue and I had the chance to visit it while we were in Korea. Located along the Ewha Womans University Fashion Street, one of the most popular shopping areas in Seoul, the new store is a massive three-storey building which boasts of modern architecture, trendy aesthetics, and an enhanced consumer experience.
Facade of the new Laneige flagship store.
The store from a different angle.
Designed with pink and blue hues, the first floor showcases the brand's various lines of makeup and skincare products, allowing customers to try and test them freely before making any purchase.
Inside the Laneige flagship store.
If you don't like the idea of using testers, you can try the Laneige Beauty Mirror, a fun and interactive app that virtually applies makeup on your face. With the Beauty Mirror, you can see how different Laneige products look on you and allows you to download the list of items that you used in the app.
Trying on the new Laneige Stained Glasstick. I'm wearing Shade #7 Pink Tourmaline.
There's also a special section of this store dedicated to the brand's line of sleeping masks. From the cult-favorite Water Sleeping Mask to the relatively new Water Bank Quick Hydro Pen, you'll find them all on display in this dreamy, psychedelic little corner.
The 'Beauty Sleep' corner featuring my favorite Laneige Water Bank Sleeping Mask.
If chemistry is your thing, you're in for a treat as this store lets you create and personalize your own Lip Sleeping Mask. It was a fun experience, and my inner nerd was thrilled to see hotplates and beakers and all that chemistry-related stuff. It's like junior high all over again!
Yue trying to read the captions before we start.
They're written in Hangul, but the staff explained to us what to do. 
Yue enjoyed this 'experiment' (as he calls it) a lot more than I did, even if he was just looking on and was not allowed to touch anything.
Step 1. Choose your scent.
Step 2 involves mixing the base and the scent and heating them up in this plate.
The base and the scent, plus all the tools you need to make your own lip sleeping mask.
Packing the finished product in the signature frosted jar. :)
The final step is designing the jar with a label/sticker of your choice.
The Laneige Lip Sleeping Mask, customized to your liking.
We also got a glimpse of the 'Study Room' at the third floor. It's a fun, experiential space where you can get hang out with your friends, perhaps enjoy some alone time with a cup of coffee and a good book, or get a one-on-one consultation with Laneige's beauty experts. This area also serves as a venue for Laneige's special events such as product launches, makeup tutorials, and beauty classes.
The 'Beauty Playground'.
We could have stayed longer and enjoyed some afternoon tea with other VIP members, but we were a little pressed for time since we were trying to catch BTS on their way to their fan meeting at Digital Media City. Next time, I'll try to sign-up for their K-beauty class, similar to the one they offer at the road shop and flagship store in Myeongdong.

To get to the Laneige Ewha Flagship Store, take exit 2 or 3 of the Ewha Womans University Station (Line 2). The store is just a few meters away from the exit.

8.12.2017

Make Home Cleaners with the Kids This Summer.

You have two tasks this summer, keep the kids busy and keep the house clean. Probably not always in that order. Why not keep the kids busy by creating a fun, sensory engaging activity that also helps keep the house clean? You know that sounds great!

Want to know what makes it sound better? They will all be green home cleaning products!

You’re going to have the kids make home cleaners that aren’t filled with harsh chemicals. Occupied kids. Clean house. No killer chemicals. Mom scores with the summer hat trick!

Get the spray bottles ready and the kids lined up on the patio table. It’s time to make some green home cleaning products, Portland style. Here are our three favorite greenhouse cleaners the kids can help make.
Busy as a bee!
Peppermint Shower Spray
Peppermint shower spray is a natural cleaner that fights icky shower mildew and shower scum. Once you have the mixture, keep a bottle in every shower and spray it down after use. You’ll love the lingering smell and feel great about keeping the shower clean without much effort.

To make the peppermint shower spray, you’ll need rubbing alcohol, water and peppermint essential oil. (If they kids aren’t helping you, feel free to substitute the rubbing alcohol for vodka; it works better and you can take a swig as needed.)

Mix 1 cup of water with ½ cup of rubbing alcohol. Add 10 drops of peppermint essential oil. Put it in the spray bottle. Shake to mix. That is it!

Disinfectant Cleaner
With the shower becoming such a happy spot in the house because of the new cleaning spray, you’ll want to expand to have the entire house clean with happy smells. This disinfectant cleaner is all-natural but truly does kill off germs.

Mix ¼ cup of white vinegar with ¼ cup of rubbing alcohol. Add 1¼ cups of water. Then add 15 drops of peppermint and lemon essential oils.

Again, vodka can be substituted for rubbing alcohol and lavender can be substituted for lemon. Add actual lemon rinds to the mixture for added effect.

To use the disinfecting cleaner, spray surfaces, allow it to sit for 10 minutes and then wipe away. For best results, us a microfiber cloth.

Note: This spray is not for granite or marble. The vinegar may actually etch the surface of these stones.

Stainless Steel Polish
If you don’t want to spend an arm and a leg on that fancy stainless steel cleaning solution, here is a cost-effective solution that really works too. And the ingredients are almost always in stock in the kitchen, because you really only need two things: olive oil and paper towels.

Rather than have the kids make this, challenge them to see who can get a better reflection in the refrigerator door.

Simply put a quarter-sized dab on a folded paper towel. Allow it to soak into the paper towel and then start at the top of the stainless steel appliance, applying the oil with the grain of the stainless steel. Work from left to right.

Once you’ve applied the olive oil to the entire appliance, rub away any excess. Buff out the finish with a paper towel or use a microfiber towel for a real sharp shine on the stainless steel.

For the days when the kids are busy at the pool, let the professionals do the dirty work. Get an estimate now for the best green house cleaning service in Portland.


9.22.2015

Hair Story | Innisfree Camellia Bubble Hair Color.

Surprise, surprise! I actually found the time to update this blog. I have been neglecting it for waaaay too long - but not without a reason, of course.

As I have mentioned in my Facebook page, my son's school activities have taken up most of my time. And with all the stuff that he's doing at school, plus his karate training during Saturdays, I don't even have the time to catch up on my Korean dramas (and you know how my day can never be complete without watching an episode or two of these Kdramas!), let alone catch up on my blog backlog. Hopefully, I will be able to get a one or two more blog posts up within this week, with the Eid ul Adha holiday coming up.

But first things first. Let me first share with you what happened last weekend (aside from Alden Richards and Yaya Dub and their most awaited date - yes, I'm a fan). I colored my hair again, and as always, in DIY-fashion.
Innisfree Camellia Bubble Hair Color.
This time around, I used the Camellia Bubble Hair Color from Innisfree, which I purchased for Php 295 from Kkochipida. There are no Innisfree stores here in the Philippines, so I usually shop for their products online. That, or my husband buys them for me. Haha. ;)
Hangul text at the back of the box.
Moving on, there are four shades to choose from in the Innisfree Camellia Bubble Hair Color Line, and the one that I got is #4 Burgundy Red.
Shade reference at the side panel.
Inside the box, you'll find the following: a pack of Coloring Solution (1), a bottle of Liquid Solution (2), two sachets of Hair Treatment (3), a cape, a pair of gloves, and an instruction booklet.
Unboxing.
The instructions are written in Hangul, and comes with illustrations for the benefit of those who can't read Korean (me included).
You're in luck if you can read Hangul.


Otherwise, you can just deduce from these illustrations. ;)
So here's what I did:
1. Wear the cape and latex gloves.
2. Pour the Coloring Solution inside the pump bottle.
3. Tilt the bottle from side to side so that it mixes with the Liquid Solution inside the bottle. Do not shake the bottle, as it may become too foamy to pump out.
4. Pump out the foamy mixture and apply it on your hair.
5. Leave it on for about 20-40 minutes. 
6. Rinse thoroughly.
7. Apply the Hair Treatment next.
8. Leave it on your hair for at least five to ten minutes.
9. Rinse.

Here's how the bubble foam looks like. It has a mild, floral scent, which I reckon comes from the camellia oil.
Grimace? :)
Like most Innisfree products, this Bubble Hair Color also has the 4-Free System. Meaning, it is free from ammonia, tar, silicone, and mineral oil. Plus points for being chemical-free!

Finally, here's how my experiment turned out.
Before.
After.
From the 'after' photo, it may seem like my roots were not colored properly. In actual, however, it did a pretty good job of coloring my hair. Totally digging the soft, pinkish red shade! :)

My only gripe? The color bleeds like crazy!
I dyed my hair last Sunday, and the color still bleeds even after two days of washing! I've tried several brands of bubble hair coloring before, but this is the first time that I've experienced excessive bleeding. I couldn't even wear light-colored tops, out of fear of staining my clothes. Here's hoping that there will be no more bleeding when I wash my hair tomorrow. Fingers crossed. ;)


3.31.2015

Hair Story | Lolane Z-Cool Bubble Color Foam in Ash Cocoa.

It's no secret that I'm a fan of DIY hair coloring kits. I've tried four different shades from the Etude House line, one from Tony Moly, another one from The Face Shop, and yet another one from Japanese brand Palty. This time around, I'm trying something from Thailand - the Lolane Z-Cool Bubble Color Foam, which I chanced upon during the last SM 3-Day Sale.
Lolane Z-Cool Bubble Color Foam.
Originally priced at Php 349, I got this for only Php 251. Quite a steal, eh?
Now I'm not sure how many shades there are in the Lolane Bubble Color Foam line, but I did see four different shades on display at the SM Department Store. I chose Ash Cocoa, because this was the lightest shade of brown among the bunch.
Inside the box - Color Foam, Developer, Keratin Repair Mask, gloves,
instruction booklet (written in English and Thai).
Inside the box you'll find a bottle of Bubble Color Foam (1), a bottle of Developer (2), a sachet of Keratin Repair Mask, a pump, a pair of gloves, and an instruction booklet written in both English and Thai. Sad to say, there's no cape included. And so prior to application, I had to wear my most ratty shirt that I wouldn't mind staining along the way.
Usage directions and shade reference at the back of the box.
To use:
1) Pour the Bubble Color Foam (bottle number 1) into the developer (bottle number 2).
2) Put on the pump dispenser. Close tightly.
3) Mix the solution by gently swirling the bottle for about 5 - 10 minutes. Do not shake!
4) Wear the gloves, then pump the foam onto your palm.
5) Apply the foam on your hair, starting from the roots all the way to your tips. Massage thoroughly on your hair.
6) Leave it on for 30 minutes.
7) Rinse off with water, then apply the Keratin Repair Mask.
8. Leave it on for at least five minutes, then rinse thoroughly.
Bubble Color Foam.
Developer.
Keratin Repair Mask.
Here's how my latest hair experiment turned out.
Before.
The growth on my roots (well, more like 1/3 of my tresses) was covered up completely and evenly. The brassy tones on my hair are gone, and are now replaced with a medium shade of brown. Not bad for Php 251. :)
After.
Now as far as the scent is concerned, Lolane smells fruity, though not as mild as Etude House's. I was able to tolerate the scent, but for those with overly sensitive noses, you might find Lolane's a bit overwhelming. 

And just like any other Bubble Hair Coloring, your hair will feel stiff and dry after rinsing the foam off. Nothing to worry about since the Keratin Repair Mask does a good job of making your hair soft and smooth right after application.

Care to give the Lolane Z-Cool Bubble Color Foam a try? :)

3.21.2015

Make More Music, and Make it Better!

Computers, digital emulators of old-school analog machinery, and cutting-edge editing software are all now easily attained by anyone with passing interest in music and a little extra spending money. Albums, record-deals, and careers have been born out of much less, so a small set-up in the bedroom or basement makes the dream of being a rock star seem even more attainable. Something that used to require schlepping gear all over town, praying to get spotted and signed, is now something doable independently, through drive, talent, and, naturally, lots of luck.
Old school!
There is, however, something most on-label acts have at their disposal that at-home artists lack: a professional-sounding recording space. The acoustics of a room play a huge role in the sound of a record, and how one hears the music they're working on, mixing, and mastering. Studios often include rooms that are built for superior acoustics off the bat, and then include a substantial amount of room treatment products to make sure the sound being recorded is true to the one being produced by the musician and his or her instruments and voice. On the other end of the spectrum, small, square, boxy rooms in homes represent one of the worst acoustical environments for recording music.
Photo credit: Musicblazt.
Fortunately, along with the technology people have access to, acoustical treatment has become more accessible too. With the right research and testing, you can address issues in your room with particular products, be they store-bought, or one of the multitude of effective DIY solutions. With the right combination of research and testing, you can identify what sonic areas you need to address most. In addition to the companies offering surprisingly affordable treatment products, like low frequency absorbers, wall tiles, and diffusors, most provide acoustical advice as well!
Regardless of how expensive or minimalist your gear is, music will only sound as good as the room allows. With the advances in room acoustics, you can get your room to help you make some of your best music ever.

Article submitted by The Foam Factory, an online resource for room-improving acoustic products, with items like wall tiles, low-frequency absorbers, and eggcrate foam for economy treatment.